
 By George Riley/photos by the author
Building your own rolling stock in large scale is not only satisfying but also surprisingly easy. Due to the size of the models many of the necessary materials are readily available from nearly every hobby and craft retailer as well as many home improvement outlets. The stripwood necessary to build a wood flatcar with truss rod underframe is readily available in the bass wood rack or if one has a tablesaw can be cut from ¼” thick clear lattice strips. In these larger scales most builders will go for what looks correct in opposition to actual scale-sized lumber. Similarly, much of the necessary hardware from screws to nails and metal rodding are equally easy to source. Specialized metal hardware like stake pockets, brake wheels or turnbuckles can be ordered online while wheels and trucks can be found at well stocked hobby outlets and online as well.
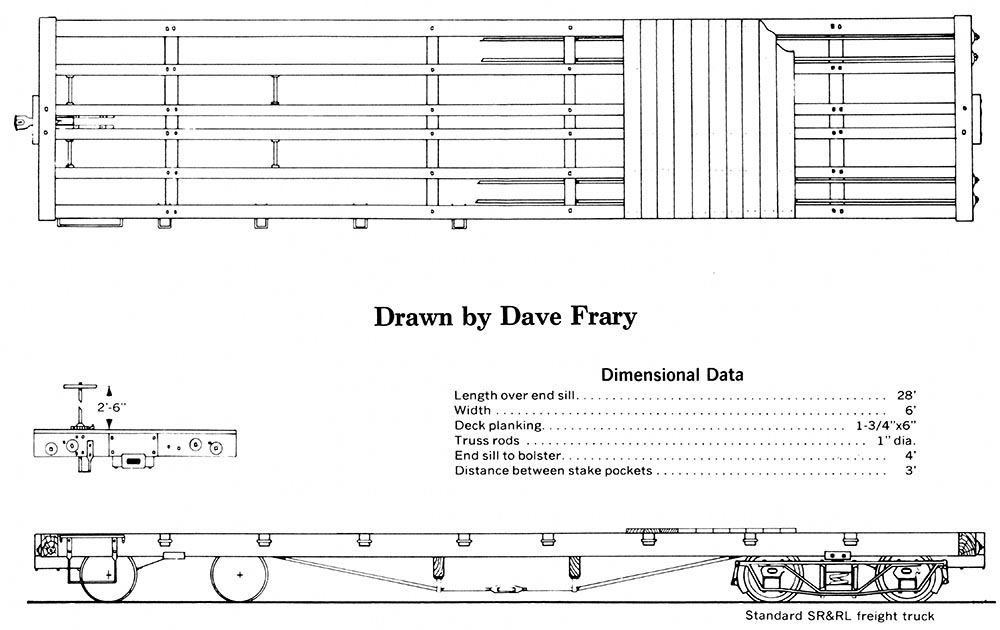
To get started, locate a drawing for the type of flatcar for the build. A good source of these is Slim Gauge Car Plans available from White River Productions, The American Railroad Freight Car by John H. White, Jr. available from many book vendors, or The Narrow Gauge & Shortline Gazette, published bi-monthly by White River Productions. For our project we found a drawing in the first named title for a Maine 2-foot-gauge flatcar drawn by Dave Frary. This 28 by 6 foot car utilizes six longitudinal stringers and two end beams for the basic underframe. Truck bolsters can be constructed from either stripwood or metal strip and the truss rods and their queen posts are mounted on timber needle beams.
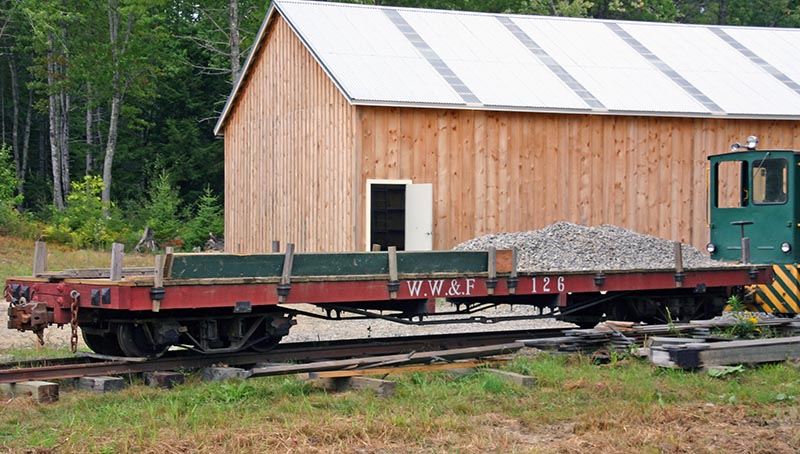
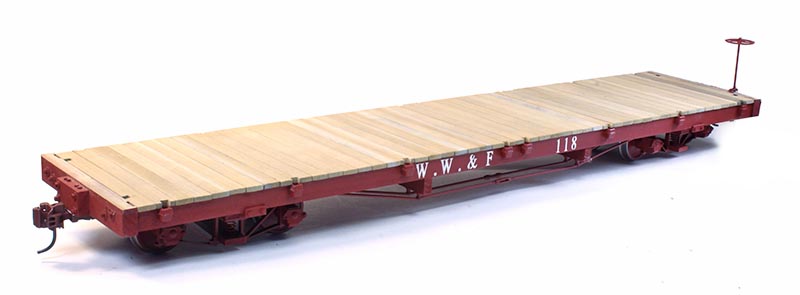
This restored flatcar is in service on the Wiscasset, Waterville & Farmington Railway in Maine.
Depending on which scale the build is planned, there will be some math required to properly scale the drawings for the project. A table is included that will easily let the modeler calculate the sizes needed for this project. Our flatcar has been constructed for 7/8n2 or to a scale of 1:13.7. This makes the overall length of the model scale out to 24½ inches. Lattice stock was ripped down for a nominal 4×9 scale dimension or roughly ¼” x 5/8” for the stringers and beams. This of course may be different if the project is being assembled in “F” or other 45 mm gauge scales.
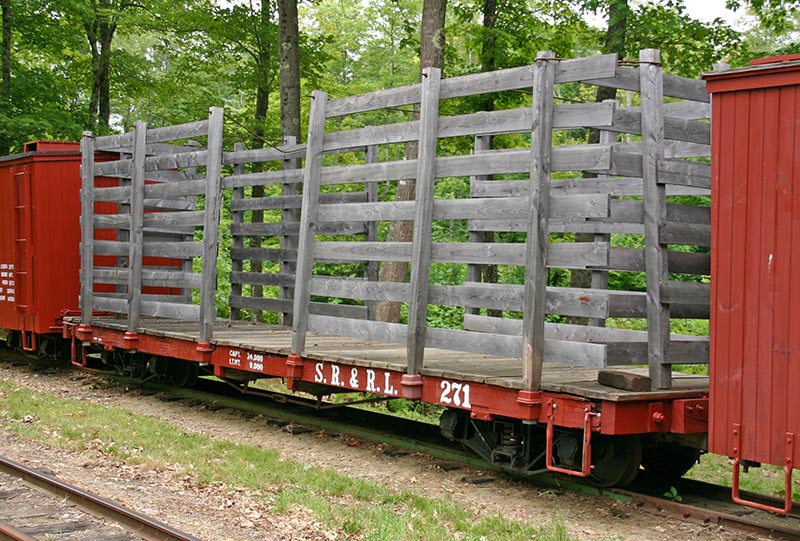
This restored flatcar on the Sandy River & Rangeley Lakes Railroad in Maine has sides built up to haul a lightweight yet bulky commodity like straw bales.
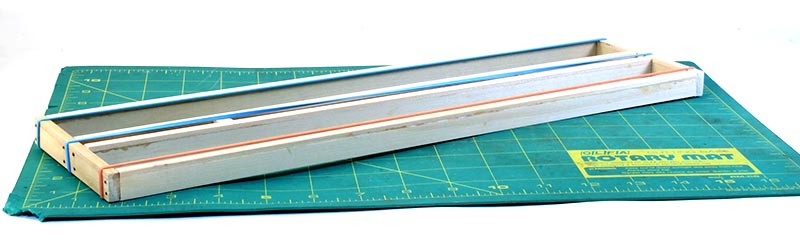
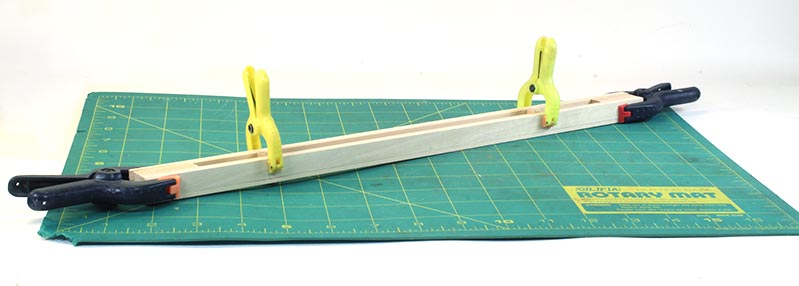
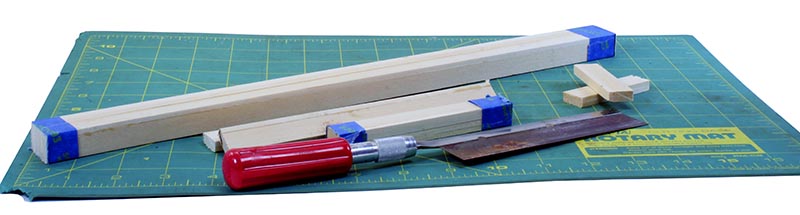
To assure that all of the stringers are cut to the same length, they are taped in a bundle and trimmed to the same dimension. The end beams are also taped together and cut to their 6 foot scale measurement as well. The builder may want to use sanding sealer to seal the wood of the frame members at this time for a more stable model. With the stringers now cut, two are used to assemble a “center beam.” This involves adding spacers in the location of the bolsters and blocks at each end to support the couplers and their boxes. Once this basic assembly has set, center the end beams at each end of the center beam. Glue and pin with Atlas track nails each of the end beams in place, then glue the edge and intermediate stringers in place. Clamp this construction with large rubber bands making sure that the underframe is flat and set aside to completely dry. For extra strength and to add additional detail to the end beams, use two track nails per stringer at either end to reinforce the glue joints on the stringers.
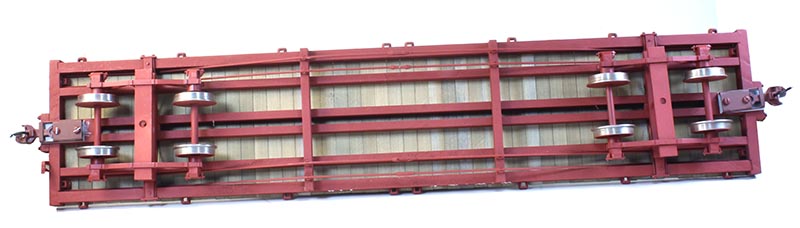
When the basic underframe has fully set, needle beams and bolsters can now be added to the model. Now drill the needle beams for queen posts and install these details. The truss rods can be made from 1/16” brass rod or even metal clothes hanger wire. Slide on a turnbuckle to each of the wires and roughly center them. Drill out eight truss rod washers with nuts to accept the truss rod wires and position in holes on each end beam before pushing through either end beam into holes in the nut/washer details. Bend each truss rod to shape and glue in place. Trim the truss wire ends and add any additional details like stirrup steps and stake pockets to the sides, plus any additional underbody details that the builder may wish to be included.
Once the underframe has been completed and basic details added, prime and paint this assembly. Usually a couple of sprayed on coats of red oxide primer sealed with a coat of clear lacquer is all the painting needed for most freight cars. On the prototype, most decks were left unfinished and acquired a deep patina after several seasons in the weather. Begin by cutting each deck board to length and stain all sides. Set aside to completely dry.
While the paints and stains are drying, build up a brake staff assembly using a brake wheel, 1/16” length of brass rod and a lock pawl. Make sure that the staff is long enough to go through the planking and end beam to engage the lower brake staff bracket. Paint this sub-assembly the body color and set aside to dry.
Final assembly includes adding the deck planking, couplers and trucks. Escutcheon pins or sequin pins can be added where each plank is attached to the stringers to provide a bit of added detail. Add two pins per joint or twelve per plank. Once the deck is in place drill out the end beam to accept the brake staff assembly.
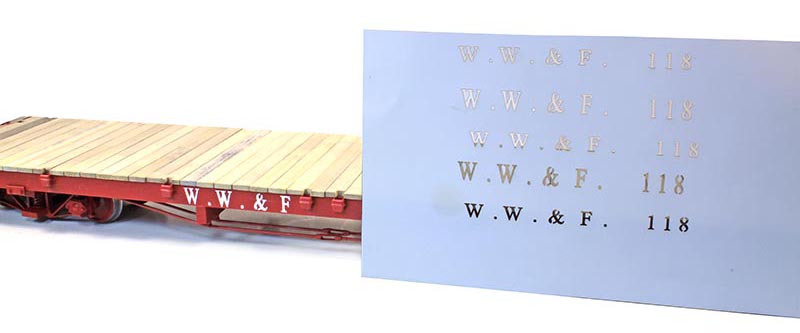
All that remains is to letter the finished car. Press type sets are available from Woodland Scenics that can be used for large scale models or you can cut a stencil by printing out the desired lettering on heavy paper stock and cutting out each letter with a sharp hobby knife or scalpel. Either spray through the stencil or used a stencil brush and thick paint to apply the lettering to either side of the car. Seal with clear matte spray to protect the lettering.
Once you have a scratchbuilt flat car, or two, under your belt, the opportunities are boundless since the basic flatcar chassis provides the starting point for almost every other type of freight car. Constructing your own rolling stock is immensely satisfying while allowing you to build up a unique roster of your own. Give it a try!
Sources of large scale parts:
![]()
